这几天刚更新了NexT主题,一直在修改细节,终于从5.1.x的版本更新到了6.0.x的版本,nodeJS和NPM也做了更新。本着
互联网共享精神,我在这里将
如何搭建Hexo+NexT博客和如何规范化写作+构建+push的流程
做详细整理。
本人目前常用
Mac。以下配置对于 Windows,Linux
自行参考。
安装Hexo
安装node.js
如果你已经安装了node.js,请忽略。
访问node.js官网,根据指引进行安装。
安装Git
如果你已经安装了Git,请忽略。
访问Git官网,根据指引进行安装。
由于众所周知的原因,Windows从上面的链接下载git for windows最好挂上一个代理,否则下载速度十分缓慢。也可以参考这个页面,收录了存储于百度云的下载地址。
安装Hexo
-
国内的朋友,因为众所周知的原因,从npm直接安装hexo会非常慢,所以你需要用到镜像源,参考上面的步骤,使用cnpm命令行工具代替默认的npm: 在windows控制台(cmd)里输入并执行
npm install -g cnpm --registry=https://registry.npm.taobao.org,然后安装hexo:cnpm install -g hexo-cli -
国外的朋友,请直接打开windows控制台,输入
npm
                            install -g
                            hexo-cli
并执行。
建站
建立本地博客文件夹
在命令行执行如下命令,其中<folder>为文件夹路径
1
2
hexo init <folder>
cd <folder>
示例
1
2
hexo init C:/hexo/myblog
cd C:/hexo/myblog
以下步骤均采用这个路径作为说明,并且
所有有关hexo的命令 均要在此路径下执行。
建立好后文件夹目录如下
1
2
3
4
5
6
7
8
9
.
├── _config.yml
├── package.json
├── .gitignore
├── node_modules
├── scaffolds
├── source
|   ├── _posts
└── themes
其中
_config.yml:博客的配置文件,可以在此配置大部分的参数。package.json:应用程序的信息。EJS, Stylus和Markdown renderer 已默认安装,您可以自由移除。package.json 1
2
3
4
5
6
7
8
9
10
11
12
13
14
15
16
17
18
19{
"name": "hexo-site",
"version": "0.0.0",
"private": true,
"hexo": {
"version": ""
},
"dependencies": {
"hexo": "^3.2.0",
"hexo-generator-archive": "^0.1.4",
"hexo-generator-category": "^0.1.3",
"hexo-generator-index": "^0.2.0",
"hexo-generator-tag": "^0.2.0",
"hexo-renderer-ejs": "^0.3.0",
"hexo-renderer-stylus": "^0.3.1",
"hexo-renderer-marked": "^0.3.0",
"hexo-server": "^0.2.0"
}
}- scaffolds:模板文件夹,当您新建文章时,Hexo会根据scaffold来建立文件。
- source:资源文件夹,存放用户资源的地方。除
_posts文件夹之外,开头命名为 _ (下划线)的文件/文件夹和隐藏的文件将会被忽略。Markdown和HTML 文件会被解析并放到 public 文件夹,而其他文件会被拷贝过去。 - themes:主题文件夹。Hexo会根据主题来生成静态页面。
- node_modules:node.js模块,一些 插件 和 依赖 会被安装到这里。
更加详细的解释请参考hexo官方文档
安装NexT主题
进入本地博客文件夹并将NexT主题clone至themes文件夹下
1
2
cd C:/hexo/myblog
git clone https://github.com/theme-next/hexo-theme-next themes/next
接着,进入./themes/next/文件夹,将
隐藏文件夹
.git删除。这一步是为了后面将网站源码push到github上的
必要工作。
你会看到,在next下也有一个_config.yml的文件,这是
NexT主题的配置文件,为了区别它和
博客配置文件,下面会用带路径的文件名来描述它们:
myblog/_config.yml:博客配置文件next/_config.yml:主题配置文件
启用NexT主题
在myblog/_config.yml里theme:选项填next,=>theme:
next,注意冒号后空一格。
到这里,建站的任务就完成了。你现在可以打开控制台,输入并执行如下命令:
1
2
cd C:/hexo/myblog
hexo g && hexo s
其中
hexo g:新建public文件夹,并在其中生成网站静态文件(html,css,等文件)hexo s:启动hexo服务器,默认情况下,访问网址为:http://localhost:4000/
你会看到控制台有如下输出:
1
2
3
4
5
6
7
8
9
10
11
12
13
14
15
16
17
18
19
20
21
22
23
24
25
26
27
28
29
30
31
32
33
34
35
36
37
38
39
40
41
42
43
44
45
46
47
48
49
50
51
52
53
54
55
INFO Start processing
INFO Files loaded in 624 ms
INFO Generated: index.html
INFO Generated: archives/index.html
INFO Generated: images/algolia_logo.svg
INFO Generated: images/cc-by-nc-nd.svg
INFO Generated: images/cc-by-nc-sa.svg
INFO Generated: images/avatar.gif
INFO Generated: images/cc-by-nc.svg
INFO Generated: images/apple-touch-icon-next.png
INFO Generated: images/cc-by-sa.svg
INFO Generated: images/cc-by.svg
INFO Generated: images/cc-zero.svg
INFO Generated: images/cc-by-nd.svg
INFO Generated: images/favicon-32x32-next.png
INFO Generated: images/favicon-16x16-next.png
INFO Generated: images/loading.gif
INFO Generated: images/placeholder.gif
INFO Generated: images/logo.svg
INFO Generated: images/quote-r.svg
INFO Generated: images/quote-l.svg
INFO Generated: images/searchicon.png
INFO Generated: archives/2018/01/index.html
INFO Generated: archives/2018/index.html
INFO Generated: lib/font-awesome/HELP-US-OUT.txt
INFO Generated: css/main.css
INFO Generated: lib/velocity/velocity.ui.min.js
INFO Generated: lib/velocity/velocity.min.js
INFO Generated: lib/font-awesome/bower.json
INFO Generated: lib/velocity/velocity.js
INFO Generated: lib/velocity/velocity.ui.js
INFO Generated: lib/jquery/index.js
INFO Generated: lib/font-awesome/fonts/fontawesome-webfont.woff
INFO Generated: lib/font-awesome/fonts/fontawesome-webfont.woff2
INFO Generated: js/src/affix.js
INFO Generated: lib/ua-parser-js/dist/ua-parser.min.js
INFO Generated: js/src/bootstrap.js
INFO Generated: js/src/motion.js
INFO Generated: js/src/js.cookie.js
INFO Generated: js/src/exturl.js
INFO Generated: js/src/algolia-search.js
INFO Generated: js/src/post-details.js
INFO Generated: js/src/scrollspy.js
INFO Generated: lib/ua-parser-js/dist/ua-parser.pack.js
INFO Generated: lib/font-awesome/css/font-awesome.min.css
INFO Generated: js/src/utils.js
INFO Generated: js/src/scroll-cookie.js
INFO Generated: lib/font-awesome/css/font-awesome.css.map
INFO Generated: lib/font-awesome/css/font-awesome.css
INFO Generated: 2018/01/22/hello-world/index.html
INFO Generated: lib/font-awesome/fonts/fontawesome-webfont.eot
INFO Generated: js/src/schemes/pisces.js
INFO 50 files generated in 865 ms
INFO Start processing
INFO Hexo is running at http://localhost:4000/. Press Ctrl+C to stop.
在浏览器地址栏输入http://localhost:4000/并访问,你应该会看到如下页面: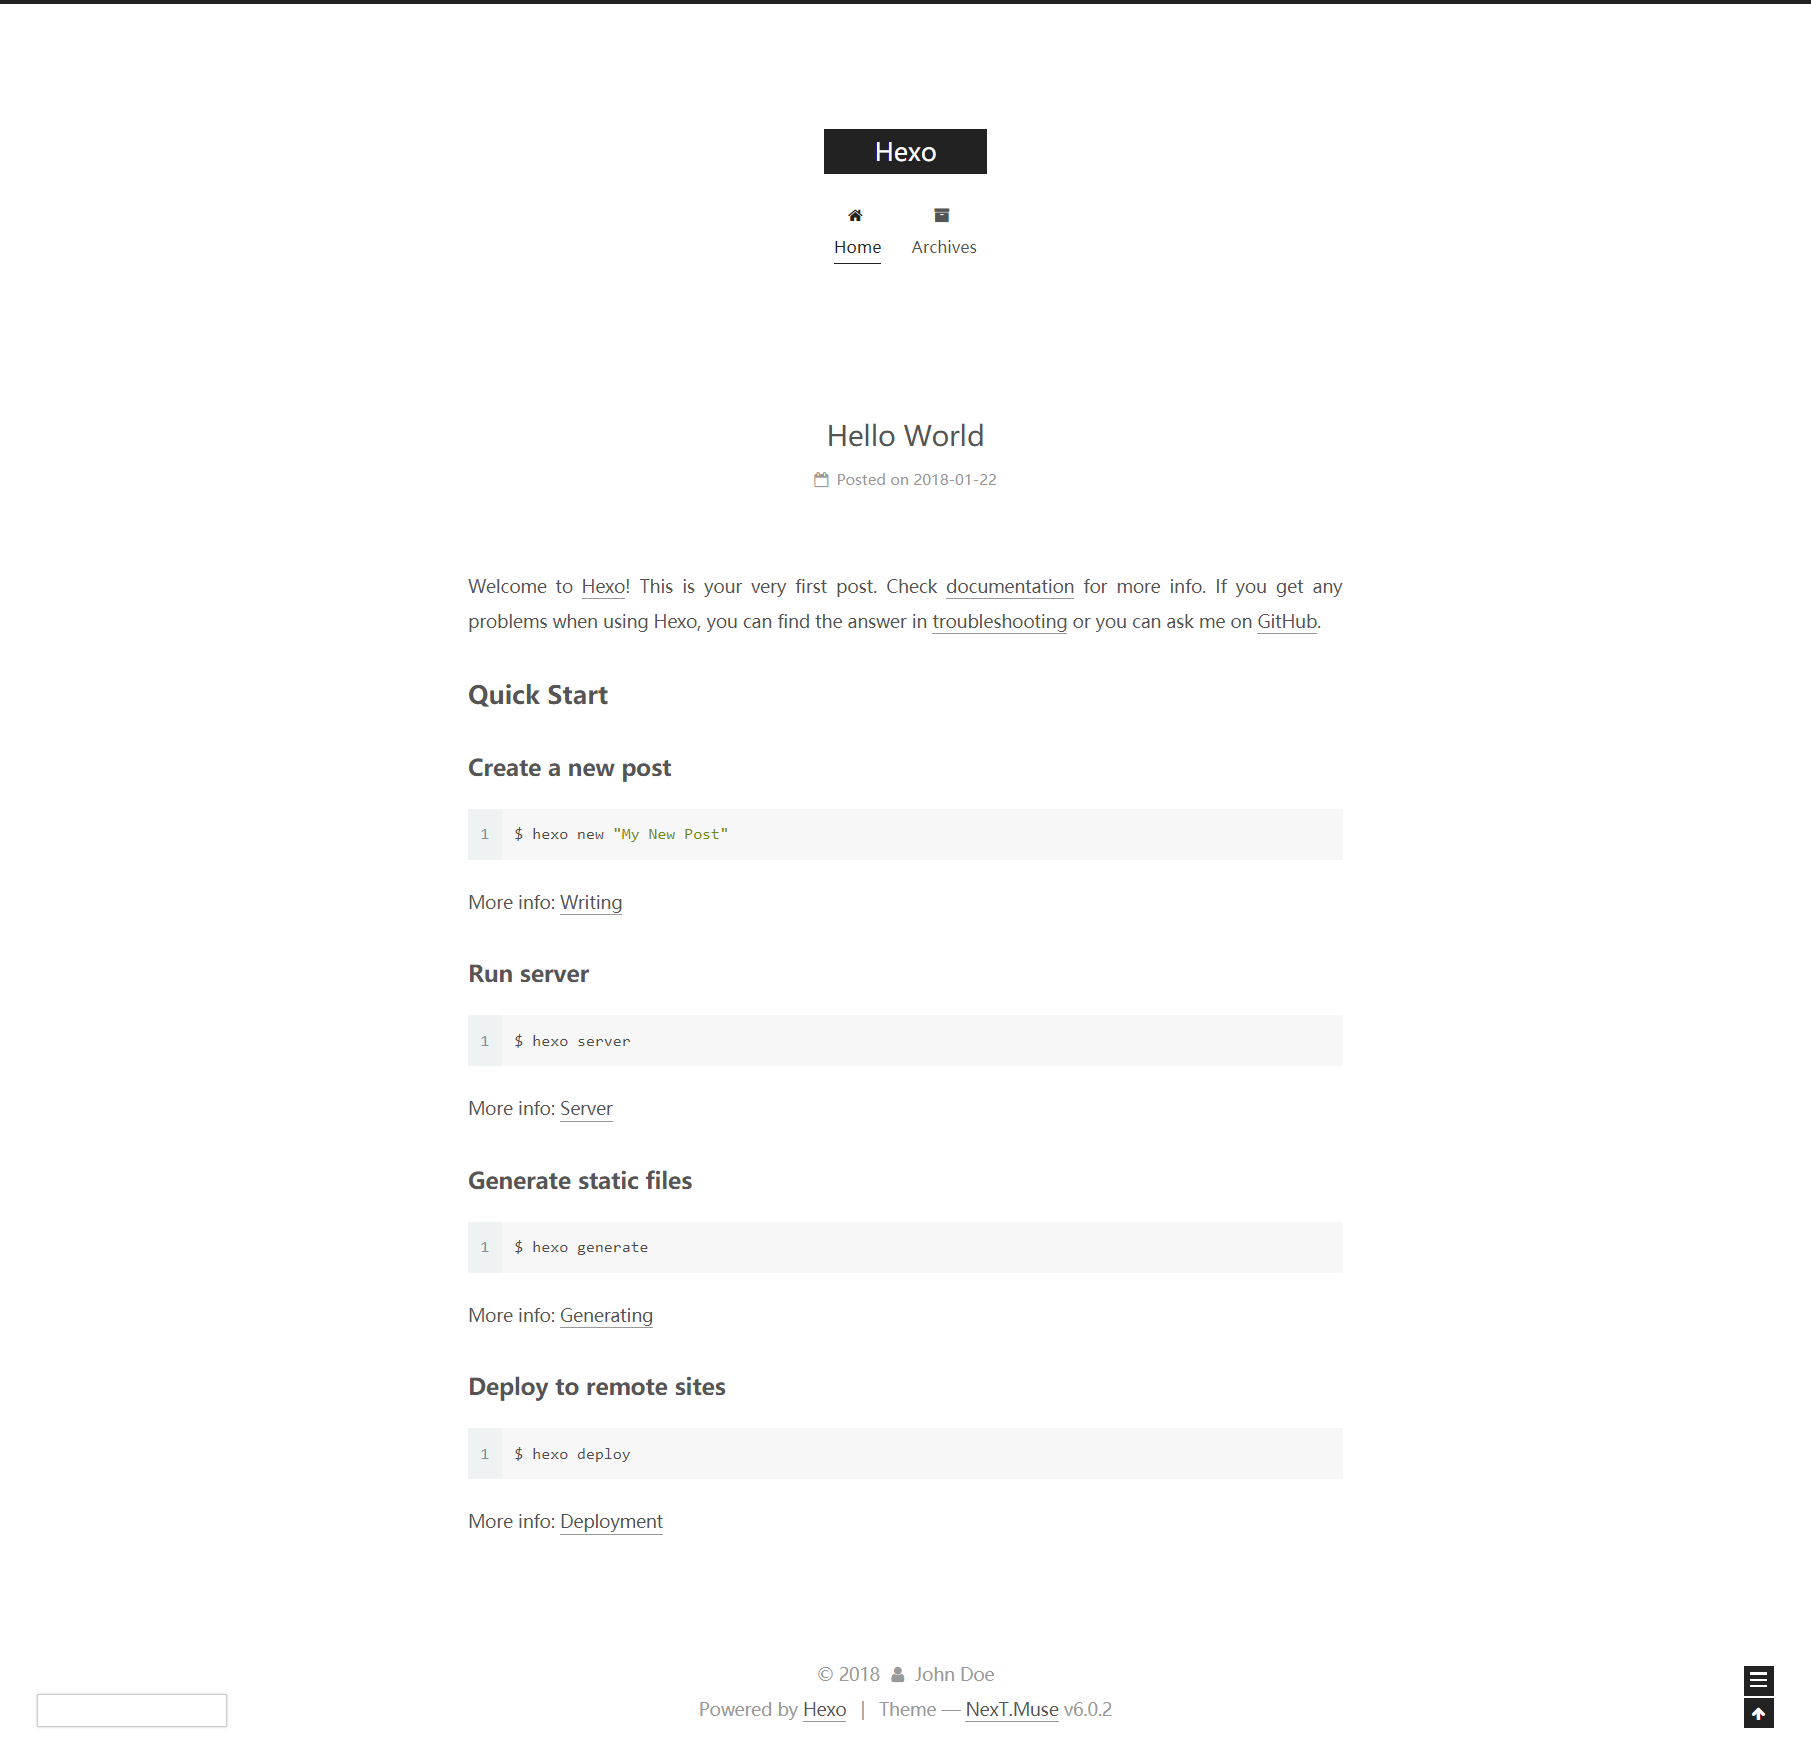
恭喜你!你已经完成了博客搭建的主要工作!接下来就是细节的配置了。请耐心阅读以下内容。
配置博客配置文件
整个myblog/_config.yml的内容如下:
1
2
3
4
5
6
7
8
9
10
11
12
13
14
15
16
17
18
19
20
21
22
23
24
25
26
27
28
29
30
31
32
33
34
35
36
37
38
39
40
41
42
43
44
45
46
47
48
49
50
51
52
53
54
55
56
57
58
59
60
61
62
63
64
65
66
67
68
69
70
71
72
73
74
75
76
77
78
79
80
# Hexo Configuration
## Docs: https://hexo.io/docs/configuration.html
## Source: https://github.com/hexojs/hexo/
# Site
title: Hexo
subtitle:
description:
author: John Doe
language:
timezone:
# URL
## If your site is put in a subdirectory, set url as 'http://yoursite.com/child' and root as '/child/'
url: http://yoursite.com
root: /
permalink: :year/:month/:day/:title/
permalink_defaults:
# Directory
source_dir: source
public_dir: public
tag_dir: tags
archive_dir: archives
category_dir: categories
code_dir: downloads/code
i18n_dir: :lang
skip_render:
# Writing
new_post_name: :title.md # File name of new posts
default_layout: post
titlecase: false # Transform title into titlecase
external_link: true # Open external links in new tab
filename_case: 0
render_drafts: false
post_asset_folder: false
relative_link: false
future: true
highlight:
enable: true
line_number: true
auto_detect: false
tab_replace:
# Home page setting
# path: Root path for your blogs index page. (default = '')
# per_page: Posts displayed per page. (0 = disable pagination)
# order_by: Posts order. (Order by date descending by default)
index_generator:
path: ''
per_page: 10
order_by: -date
# Category & Tag
default_category: uncategorized
category_map:
tag_map:
# Date / Time format
## Hexo uses Moment.js to parse and display date
## You can customize the date format as defined in
## http://momentjs.com/docs/#/displaying/format/
date_format: YYYY-MM-DD
time_format: HH:mm:ss
# Pagination
## Set per_page to 0 to disable pagination
per_page: 10
pagination_dir: page
# Extensions
## Plugins: https://hexo.io/plugins/
## Themes: https://hexo.io/themes/
theme:
                        next
# Deployment
## Docs: https://hexo.io/docs/deployment.html
deploy:
type:
博客基础配置
这里是配置博客基础的地方,包括
博客名,小标题,描述,站长名(你的昵称),语言,时区。
1
2
3
4
5
6
7
# Site
title: # 博客名
subtitle: # 小标题
description: # 描述
author: # 你叫啥
language: # 语言
timezone: # 时区
下面是我的配置:
1
2
3
4
5
6
7
# Site
title: 淦
subtitle: n*m*lg(b)
description: 汝亦知射乎?吾射不亦精乎?
author: tankeryang
language: zh-Hans
timezone:
你可以参考一下 哪项配置分别对应哪个位置,其中language:
zh-Hans这里是根据
主题是否支持
来设置的,因为渲染的js和css等文件都在主题里。NexT主题支持的语言参考这里。hexo默认使用您计算机设置的时区。更改时区请参考时区列表,比如如果您想换成
纽约时区,您需填America/New_York。
博客url配置
这里是配置你的博客 链接格式 的,包括 主站
和
文章 链接。
1
2
3
4
5
6
# URL
## If your site is put in a subdirectory, set url as 'http://yoursite.com/child' and root as '/child/'
url: http://yoursite.com # 博客链接
root: / # 博客根目录
permalink: :year/:month/:day/:title/ # 文章的永久链接格式
permalink_defaults: # 永久链接中各部分的默认值
这是我的配置:
1
2
3
4
url: https://tankeryang.github.io
root: /
permalink: posts/:title/
permalink_defaults:
这里我的博客链接是https://tankeryang.github.io,因为我是挂在github上的。root设置为/。如果你的博客是在
子目录
下,如http://yoursite.com/child,你需这样设置:
1
2
url: http://yoursite.com/child
root: /child/
接着是permalink的配置,hexo默认的是:year/:month/:day/:title/的格式。比如我点开博客搭建好之后的默认博文
Hello
World,它的链接是这样的:http://localhost:4000/2018/01/22/hello-world/: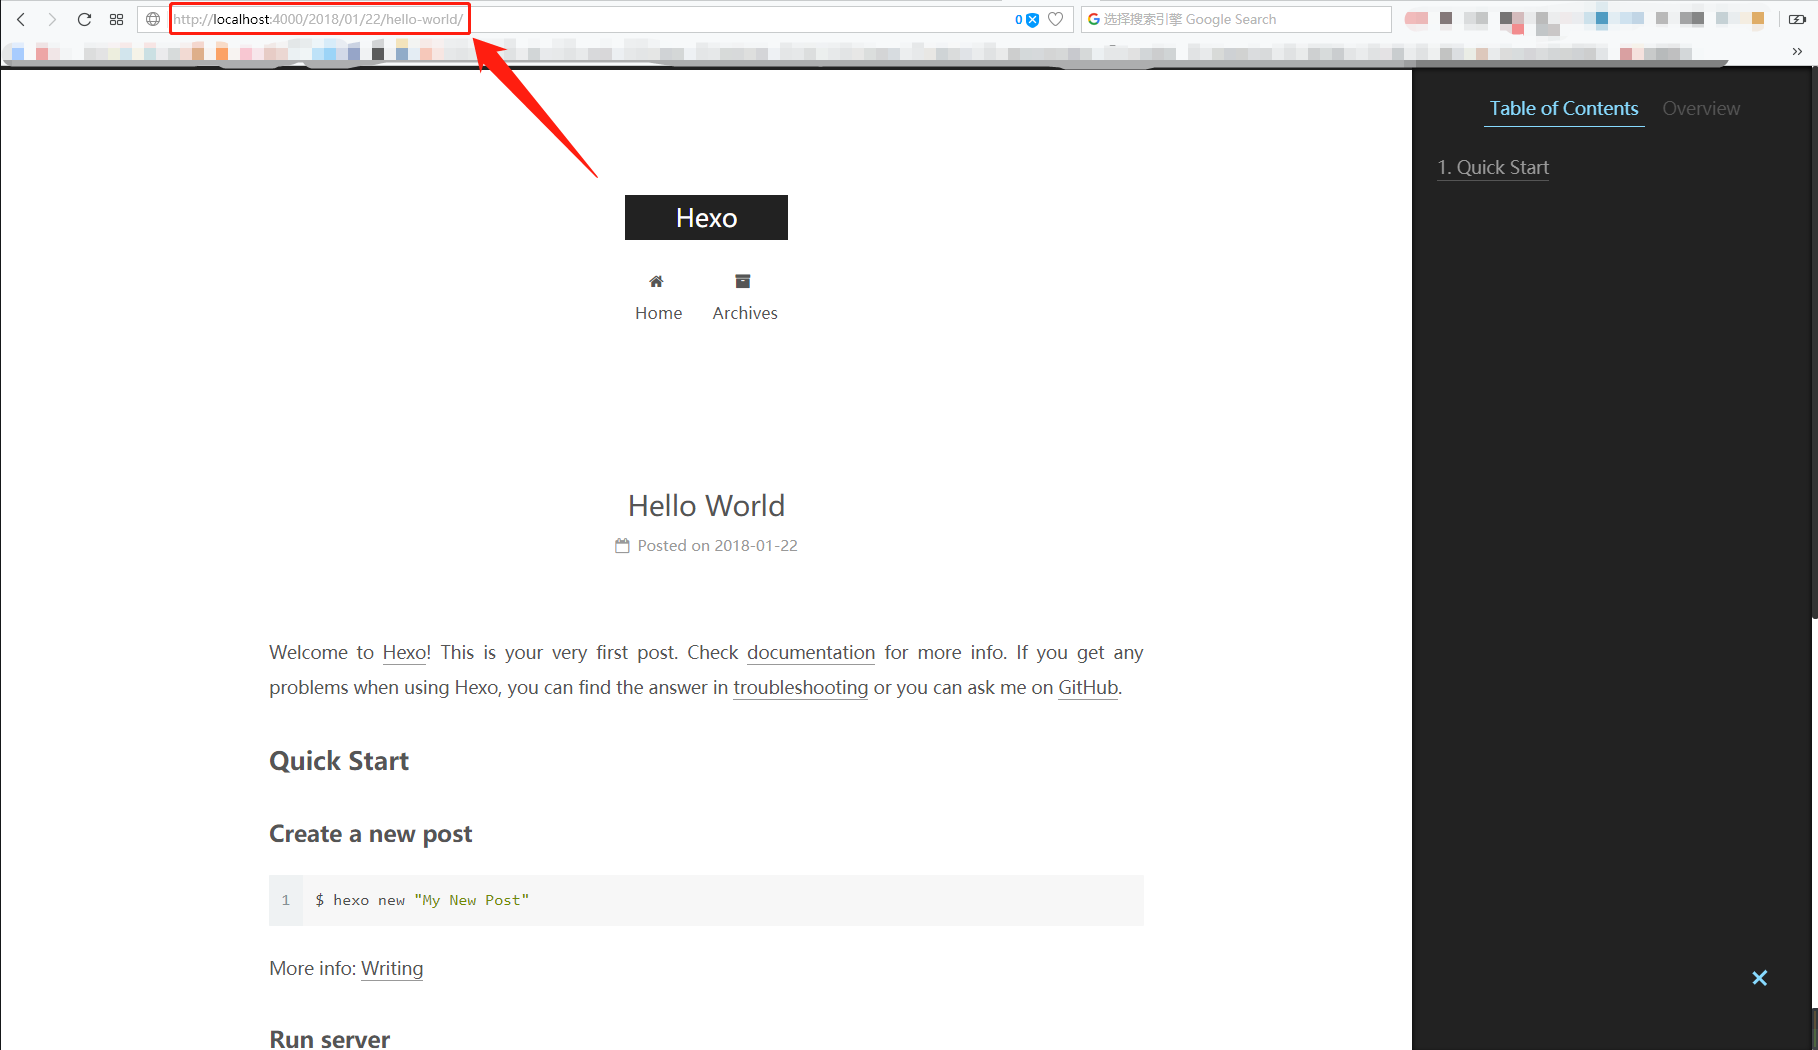
如果你想 更改文章永久链接格式 的话,以下是和链接格式有关的变量,你可以根据以下变量来配置:
| 变量 | 描述 |
|---|---|
:year |
文章的发表年份(4 位数) |
:month |
文章的发表月份(2 位数) |
:i_month
|
文章的发表月份(去掉开头的零) |
:day |
文章的发表日期 (2 位数) |
:i_day |
文章的发表日期(去掉开头的零) |
:title |
文件名称 |
:id |
文章 ID |
以下内容更新于2018/1/24,承接上文
配置资源文件夹
资源(Asset)代表source文件夹中除了文章以外的所有文件,例如图片、CSS、JS
文件等。比方说,如果你的Hexo项目中只有少量图片,那最简单的方法就是将它们放在 source/images
文件夹中。然后通过类似于的方法访问它们。
如果你想要更有规律地提供图片和其他资源以及想要将他们的资源分布在各个文章上的人来说,Hexo也提供了更组织化的方式来管理资源。这个稍微有些复杂但是管理资源非常方便的功能可以通过将config.yml文件中的post_asset_folder选项设为true来打开:
1
post_asset_folder: true # 设置为true
设置为true后,当你新建一篇文章时,hexo同时会新建一个
和文章标题一样名字
的文件夹,你的文章所引用的图片等资源就可以放在这里面了。
将所有与你的文章有关的资源放在这个关联文件夹中之后,你可以通过标签插件来引用它们,这样你就得到了一个更简单而且方便得多的工作流。关于什么是标签插件,接下来的内容会说明。请耐心阅读。(你也可以点击上面的链接浏览一下标签插件的内容)
以下内容更新于2018/1/25,承接上文(不好意思,本人很懒…)
写作
新建文章
执行如下命令新建文章:
1
hexo new [layout] <title>
其中[layout]字段是文章的
布局,默认为post,可以通过修改_config.yml中的default_layout参数来指定默认布局。<title>则是文章标题。
布局
Hexo
有三种默认布局:post、page和draft,它们分别对应不同的路径,而您
自定义的其他布局
和post相同,都将储存到source/_posts文件夹。
| 布局 | 路径 |
|---|---|
post |
source/_posts |
page |
source |
draft |
source/_draft |
其实布局我到现在也不是很清楚是什么,我是这样认为的:
如果你执行了这条命令hexo new post "new
article",hexo会新建一个new
article.md文件在source/_post文件夹下。同理,其他两个布局参照上面的路径新建文章。
文件名称
Hexo默认以 标题
作为文件名称,你也可编辑myblog/_config.yml中的new_post_name参数来改变默认的文件名称,比如设置为:
1
new_post_name: :year-:month-:day-:title.md # File name of new posts
这样在 文章名 前面就会加上日期和时间共同组成 文件名。
下面是一些可用来配置文件名的变量:
| 变量 | 描述 |
|---|---|
:title |
标题(小写,空格将会被替换为短杠) |
:year |
建立的年份,比如,2015 |
:month |
建立的月份(有前导零),比如,04 |
i_month
|
建立的月份(无前导零),比如,4 |
:day |
建立的日期(有前导零),比如,07 |
i_day |
建立的日期(无前导零),比如,7 |
下面,我们就来尝试一下吧!
首先,执行
1
hexo new post "caonima"
你会看到输出
1
INFO Created: C:/hexo/myblog/source/_posts/caonima.md
同时,在source/_post文件夹下多了caonima.md文件和caonima文件夹。
1
2
3
4
.
├── caonima.md
├── hello-world.md
├── caonima
打开caonima.md,你会看到这些
1
2
3
4
5
title: caonima
date: 2018-01-25 13:06:28
tags:
这些是
front-matter,下面我会对它进行说明,请耐心阅读(这句话我到底讲了几次)。
接下来你可以随便在里面写点内容,比如:
1
2
3
4
5
6
7
8
9
10
11
12
# caonima
## caonima
### caonima
__caonima__
_caonima_
* caonima
> caonima
[caonima]()
~~caonima~~
`caonima`
保存。执行下面语句生成博客文件并运行本地hexo服务端:
1
hexo g && hexo s
你会看到如下输出:
1
2
3
4
5
6
7
8
9
10
11
12
13
14
15
16
17
18
19
20
21
22
23
24
25
26
27
28
29
30
31
32
33
34
35
36
37
38
39
40
41
42
43
44
45
46
47
48
49
50
51
52
53
54
55
56
INFO Start processing
INFO Files loaded in 642 ms
INFO Generated: 2018/01/22/hello-world/index.html
INFO Generated: archives/index.html
INFO Generated: index.html
INFO Generated: archives/2018/01/index.html
INFO Generated: archives/2018/index.html
INFO Generated: images/avatar.gif
INFO Generated: images/apple-touch-icon-next.png
INFO Generated: images/cc-by-nc-nd.svg
INFO Generated: images/algolia_logo.svg
INFO Generated: images/cc-by-nc-sa.svg
INFO Generated: images/cc-by-nd.svg
INFO Generated: images/cc-by-nc.svg
INFO Generated: images/cc-by.svg
INFO Generated: images/favicon-16x16-next.png
INFO Generated: images/cc-zero.svg
INFO Generated: images/favicon-32x32-next.png
INFO Generated: images/cc-by-sa.svg
INFO Generated: images/logo.svg
INFO Generated: images/placeholder.gif
INFO Generated: images/quote-l.svg
INFO Generated: images/loading.gif
INFO Generated: images/quote-r.svg
INFO Generated: lib/font-awesome/HELP-US-OUT.txt
INFO Generated: lib/font-awesome/css/font-awesome.css.map
INFO Generated: images/searchicon.png
INFO Generated: lib/font-awesome/fonts/fontawesome-webfont.woff2
INFO Generated: lib/font-awesome/fonts/fontawesome-webfont.woff
INFO Generated: js/src/algolia-search.js
INFO Generated: js/src/exturl.js
INFO Generated: js/src/affix.js
INFO Generated: js/src/post-details.js
INFO Generated: js/src/motion.js
INFO Generated: js/src/scroll-cookie.js
INFO Generated: js/src/utils.js
INFO Generated: js/src/scrollspy.js
INFO Generated: lib/font-awesome/bower.json
INFO Generated: js/src/js.cookie.js
INFO Generated: js/src/bootstrap.js
INFO Generated: lib/velocity/velocity.ui.min.js
INFO Generated: lib/ua-parser-js/dist/ua-parser.pack.js
INFO Generated: js/src/schemes/pisces.js
INFO Generated: lib/ua-parser-js/dist/ua-parser.min.js
INFO Generated: css/main.css
INFO Generated: lib/jquery/index.js
INFO Generated: lib/velocity/velocity.ui.js
INFO Generated: lib/font-awesome/css/font-awesome.css
INFO Generated: lib/velocity/velocity.min.js
INFO Generated: lib/font-awesome/css/font-awesome.min.css
INFO Generated: lib/velocity/velocity.js
INFO Generated: lib/font-awesome/fonts/fontawesome-webfont.eot
INFO Generated: 2018/01/25/caonima/index.html
INFO 51 files generated in 1 s
INFO Start processing
INFO Hexo is running at http://localhost:4000/. Press Ctrl+C to stop.
在浏览器输入http://localhost:4000/并访问,你会看到这样的页面: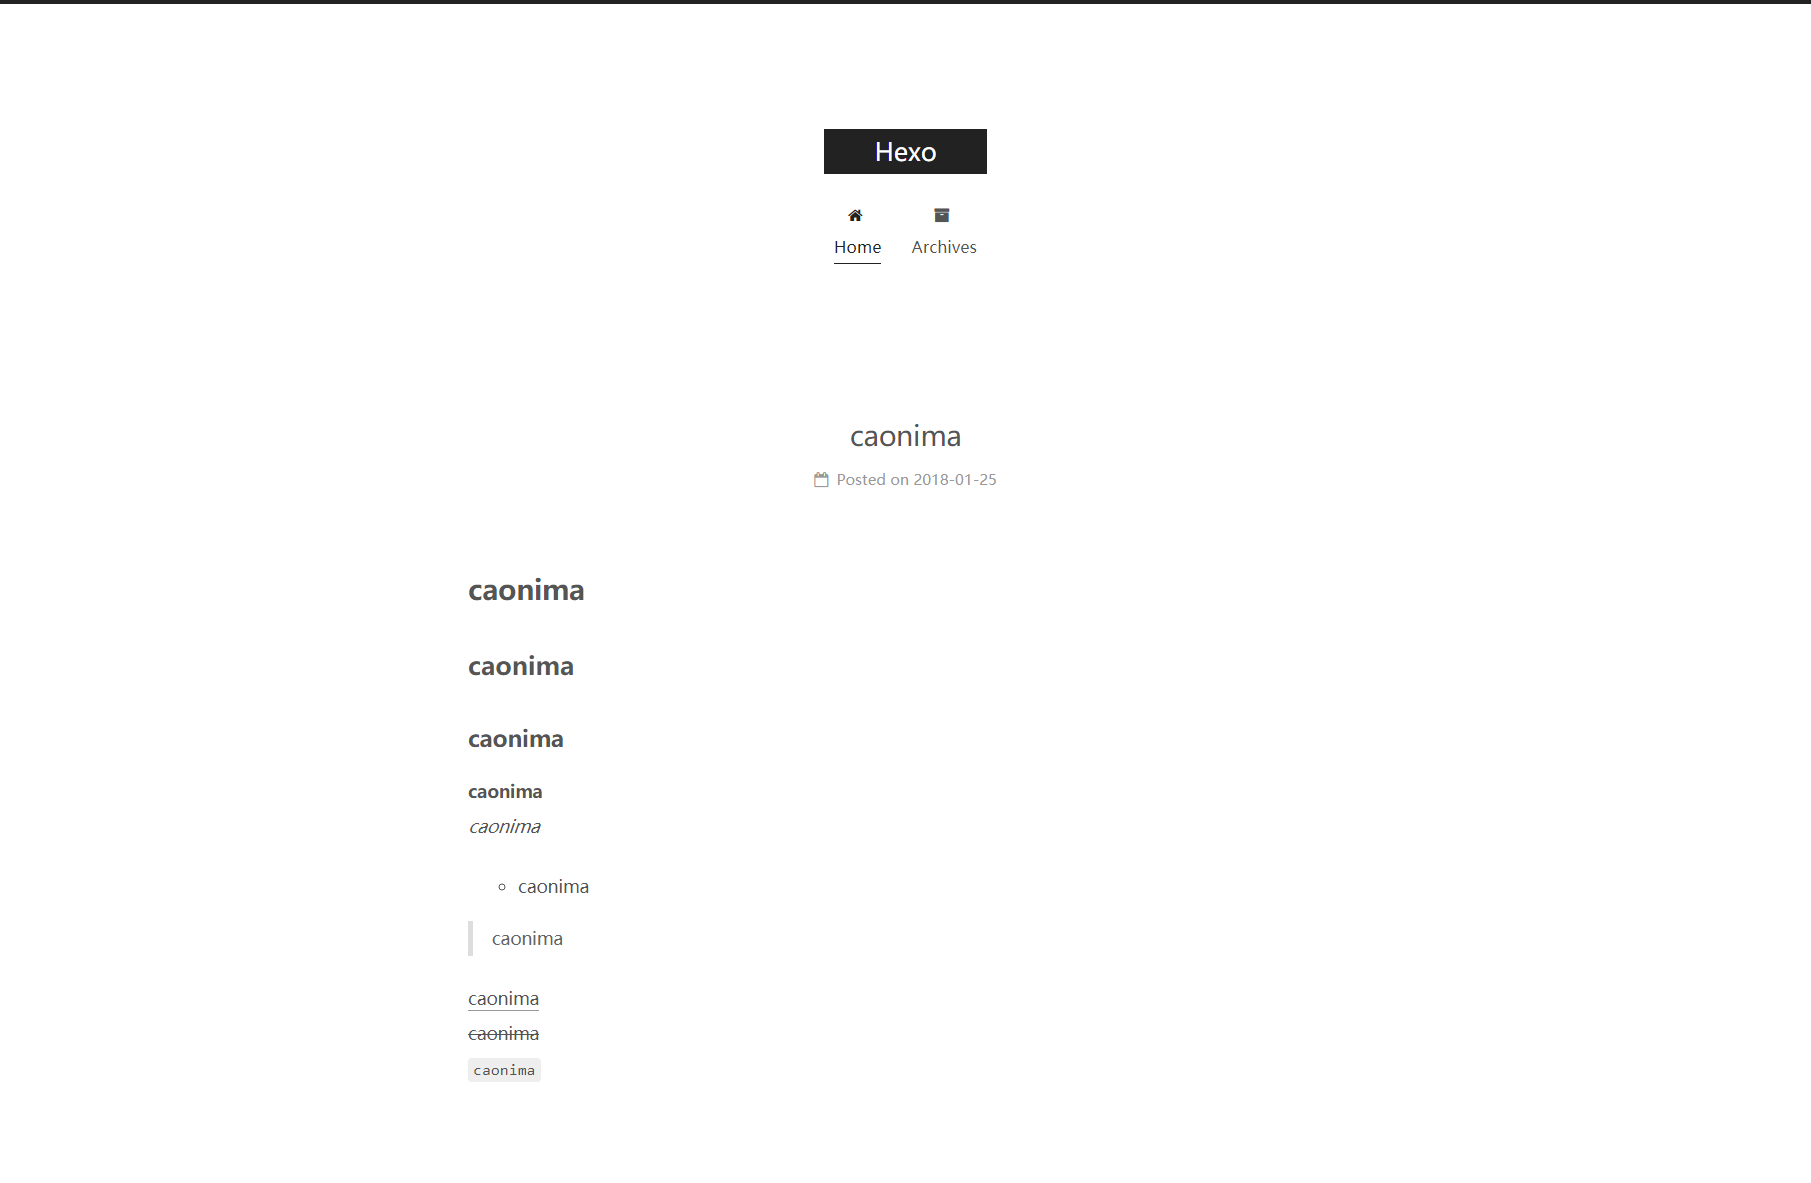
恭喜你!你已经可以进行简单的文字创作了!下面的任务就是让你的写作流程规范化的细节。请耐心阅读。
标签插件
从上方跳转过来的朋友, 点此返回资源配置文件夹处
标签插件是用于在文章中快速插入特定内容的插件。
它的在文章中用法一般是这样:
1
2
3
{% [某种标签] %}
<你想插入的内容>
{% end[某种标签] %}
或者这样:
1
{% [某种标签] <你想插入的内容> %}
用例子说明最快:
比如像前面提到的,用标签插件在文章引用图片,你只需这样写
1
{% asset_img <图片文件名> %}
示例
1
{% asset_img caonima.jpg %}
这是我最常用的标签了,asset_img,顾名思义,就是图片资源。一般我都用它来插入图片。因为我们在前面配置了
资源文件夹,所以<图片文件名>这里我们不用输入绝对路径,只需输入图片文件名
就ok了,hexo会自动在资源文件夹里寻找你的图片。
你可以在caonima文件夹里放一张图片,然后在caonima.md里用上面的asset_img标签插件来引用它,看看效果。
配置主题配置文件
NexT主题作为hexo众多主题里最火的一款,除了简约美观的设计之外,最重要的一点就是 可定制化的程度高。你可以很轻松的 开启或关闭某些功能,甚至 自己尝试添加一些功能也比其他主题简单,因为它的 源文件组织得很清晰,主题的 布局,js,css,字体,语言,等文件都独立区分。
下面我会参照我的配置来详细介绍如何配置NexT主题。
重要更新
在v6.0.x的版本里,NexT新增了
缓存
这样一个特性:
1
2
3
# Allow to cache content generation. Introduced in NexT v6.0.0.
cache:
enable: true
这是一个非常强大的改进!也就是说,当我们执行了hexo s预览博客内容时,同时对
文章内容 或
主题配置 做了一些修改,我们只需 刷新一下
页面就能实时看到更改效果,而不用重新执行hexo clean && hexo
g来重新生成页面。对此我只能说666666
网站图标
下面就是网站图标的配置项:
1
2
3
4
5
6
7
8
9
# For example, you put your favicons into `hexo-site/source/images` directory.
# Then need to rename & redefine they on any other names, otherwise icons from Next will rewrite your custom icons in Hexo.
favicon:
small: /images/favicon-16x16-next.png
medium: /images/favicon-32x32-next.png
apple_touch_icon: /images/apple-touch-icon-next.png
safari_pinned_tab: /images/logo.svg
#android_manifest: /images/manifest.json
#ms_browserconfig: /images/browserconfig.xml
参照注释,先在myblog/source/路径下新建images文件夹,找一张16x16的ico或者png图标,放进images文件夹(在哪里找图标请自行百度),比如caonima.ico。
然后将small选项设置为/images/caonima.ico:
1
2
favicon:
small: /images/caonima.ico
再将其他的选项注释掉(因为基本用不到):
1
2
3
4
5
6
7
favicon:
small: /images/caonima.ico
#medium: /images/favicon-32x32-next.png
#apple_touch_icon: /images/apple-touch-icon-next.png
#safari_pinned_tab: /images/logo.svg
#android_manifest: /images/manifest.json
#ms_browserconfig: /images/browserconfig.xml
网站图标配置就完成了。关于其他选项你可以有空自己放些图标文件来玩玩看什么效果。
网站底部内容
这些在footer选项的配置里:
1
2
3
4
5
6
7
8
9
10
11
12
13
14
15
16
17
18
19
20
21
22
footer:
# Specify the date when the site was setup.
# If not defined, current year will be used.
#since: 2015
# Icon between year and copyright info.
icon: user
# If not defined, will be used `author` from Hexo main config.
copyright:
# -------------------------------------------------------------
# Hexo link (Powered by Hexo).
powered: true
theme:
# Theme & scheme info link (Theme - NexT.scheme).
enable: true
# Version info of NexT after scheme info (vX.X.X).
version: true
# -------------------------------------------------------------
# Any custom text can be defined here.
#custom_text: Hosted by <a target="_blank" rel="external nofollow" href="https://pages.coding.me"><b>Coding Pages</b></a>
默认图标是user。假如你想个性化的话可以参照fontawsome提供的图标来进行选择。下面是我的配置:
1
2
3
4
5
6
7
8
9
10
11
12
13
14
15
16
17
18
19
20
21
22
23
24
25
footer:
# Specify the date when the site was setup.
# If not defined, current year will be used.
since: 2017
# Icon between year and copyright info.
icon: cog
# spiner icon
rotate: fa-spin fa-lg margin-bottom
#rotate_plus : fa-plus fa-lg margin-bottom
# If not defined, will be used `author` from Hexo main config.
copyright:
# -------------------------------------------------------------
# Hexo link (Powered by Hexo).
powered: true
theme:
# Theme & scheme info link (Theme - NexT.scheme).
enable: true
# Version info of NexT after scheme info (vX.X.X).
version: true
# -------------------------------------------------------------
# Any custom text can be defined here.
#custom_text: Hosted by <a target="_blank" href="https://pages.github.com">GitHub Pages</a>
菜单栏设置
这些在menu选项里:
1
2
3
4
5
6
7
8
9
10
11
12
13
14
15
16
17
18
19
20
21
22
23
# ---------------------------------------------------------------
# Menu Settings
# ---------------------------------------------------------------
# When running the site in a subdirectory (e.g. domain.tld/blog), remove the leading slash from link value (/archives -> archives).
# Usage: `Key: /link/ || icon`
# Key is the name of menu item. If translate for this menu will find in languages - this translate will be loaded; if not - Key name will be used. Key is case-senstive.
# Value before `||` delimeter is the target link.
# Value after `||` delimeter is the name of FontAwesome icon. If icon (with or without delimeter) is not specified, question icon will be loaded.
menu:
home: / || home
#about: /about/ || user
#tags: /tags/ || tags
#categories: /categories/ || th
archives: /archives/ || archive
#schedule: /schedule/ || calendar
#sitemap: /sitemap.xml || sitemap
#commonweal: /404/ || heartbeat
# Enable/Disable menu icons / item badges.
menu_settings:
icons: true
badges: false
||后面的icon对应的是fontawsome相应的图标名。如果你想添加about菜单的话,按照以下步骤:
- 在
myblog下新建about文件夹 - 在
about文件夹下新增index.md文件 - 在
index.md里添加内容 - 在
menu选项里添加about: /about/ || user
刷新一下看看效果。你会发现多了一个about菜单。用这样的办法可以自定义很多菜单目录。
主题布局
NexT主题提供了4种不同风格的主题布局,按需设置:
1
2
3
4
5
6
7
8
9
# ---------------------------------------------------------------
# Scheme Settings
# ---------------------------------------------------------------
# Schemes
scheme: Muse
#scheme: Mist
#scheme: Pisces
#scheme: Gemini
侧边栏设置
这一项的内容有点多,先放配置文件,我们一个个看:
1
2
3
4
5
6
7
8
9
10
11
12
13
14
15
16
17
18
19
20
21
22
23
24
25
26
27
28
29
30
31
32
33
34
35
36
37
38
39
40
41
42
43
44
45
46
47
48
49
50
51
52
53
54
55
56
57
58
59
60
61
62
63
64
65
66
67
68
69
70
71
72
73
74
75
76
77
78
79
80
81
82
83
84
85
86
87
88
89
90
91
92
93
94
95
96
97
98
99
100
101
102
# ---------------------------------------------------------------
# Sidebar Settings
# ---------------------------------------------------------------
# Posts / Categories / Tags in sidebar.
site_state: true
# Social Links.
# Usage: `Key: permalink || icon`
# Key is the link label showing to end users.
# Value before `||` delimeter is the target permalink.
# Value after `||` delimeter is the name of FontAwesome icon. If icon (with or without delimeter) is not specified, globe icon will be loaded.
#social:
#GitHub: https://github.com/yourname || github
#E-Mail: mailto:yourname@gmail.com || envelope
#Google: https://plus.google.com/yourname || google
#Twitter: https://twitter.com/yourname || twitter
#FB Page: https://www.facebook.com/yourname || facebook
#VK Group: https://vk.com/yourname || vk
#StackOverflow: https://stackoverflow.com/yourname || stack-overflow
#YouTube: https://youtube.com/yourname || youtube
#Instagram: https://instagram.com/yourname || instagram
#Skype: skype:yourname?call|chat || skype
social_icons:
enable: true
icons_only: false
transition: false
# Dependencies: exturl: true in Tags Settings section below.
# To encrypt links above use https://www.base64encode.org
# Example encoded link: `GitHub: aHR0cHM6Ly9naXRodWIuY29tL3RoZW1lLW5leHQ= || github`
exturl: false
# Follow me on GitHub banner in right-top corner.
# Usage: `permalink || title`
# Value before `||` delimeter is the target permalink.
# Value after `||` delimeter is the title and aria-label name.
#github_banner: https://github.com/yourname || Follow me on GitHub
# Blog rolls
links_icon: link
links_title: Links
links_layout: block
#links_layout: inline
#links:
#Title: http://example.com/
# Sidebar Avatar
avatar:
# in theme directory(source/images): /images/avatar.gif
# in site directory(source/uploads): /uploads/avatar.gif
# You can also use other linking images.
url: #/images/avatar.gif
# If true, the avatar would be dispalyed in circle.
rounded: false
# The value of opacity should be choose from 0 to 1 to set the opacity of the avatar.
opacity: 1
# If true, the avatar would be rotated with the cursor.
rotated: false
# Table Of Contents in the Sidebar
toc:
enable: true
# Automatically add list number to toc.
number: true
# If true, all words will placed on next lines if header width longer then sidebar width.
wrap: false
# Creative Commons 4.0 International License.
# http://creativecommons.org/
# Available: by | by-nc | by-nc-nd | by-nc-sa | by-nd | by-sa | zero
#creative_commons: by-nc-sa
#creative_commons:
sidebar:
# Sidebar Position, available value: left | right (only for Pisces | Gemini).
position: left
#position: right
# Sidebar Display, available value (only for Muse | Mist):
# - post expand on posts automatically. Default.
# - always expand for all pages automatically
# - hide expand only when click on the sidebar toggle icon.
# - remove Totally remove sidebar including sidebar toggle.
display: post
#display: always
#display: hide
#display: remove
# Sidebar offset from top menubar in pixels (only for Pisces | Gemini).
offset: 12
# Back to top in sidebar (only for Pisces | Gemini).
b2t: false
# Scroll percent label in b2t button.
scrollpercent: false
# Enable sidebar on narrow view (only for Muse | Mist).
onmobile: false
social: 这一项被注释掉了,我们先取消注释。配置内容就是对应的社交账号链接。github_banner: 右上角的 follow me on githublinks: 放一些友情链接或其它的你想放的链接avatar: 头像的一些设置
其余的设置参考他给出的注释说明配置即可。下面是我的配置:
1
2
3
4
5
6
7
8
9
10
11
12
13
14
15
16
17
18
19
20
21
22
23
24
25
26
27
28
29
30
31
32
33
34
35
36
37
38
39
40
41
42
43
44
45
46
47
48
49
50
51
52
53
54
55
56
57
58
59
60
61
62
63
64
65
66
67
68
69
70
71
72
73
74
75
76
77
78
79
80
81
82
83
84
85
86
87
88
89
90
91
92
93
94
95
96
97
# ---------------------------------------------------------------
# Sidebar Settings
# ---------------------------------------------------------------
# Posts / Categories / Tags in sidebar.
site_state: true
# Social Links.
# Usage: `Key: permalink || icon`
# Key is the link label showing to end users.
# Value before `||` delimeter is the target permalink.
# Value after `||` delimeter is the name of FontAwesome icon. If icon (with or without delimeter) is not specified, globe icon will be loaded.
social:
GitHub: https://github.com/tankeryang || github
E-Mail: mailto:youngzyang@outlook.com || envelope
#Google: https://plus.google.com/yourname || google
#Twitter: https://twitter.com/yourname || twitter
#FB Page: https://www.facebook.com/yourname || facebook
#VK Group: https://vk.com/yourname || vk
#StackOverflow: https://stackoverflow.com/yourname || stack-overflow
#YouTube: https://youtube.com/yourname || youtube
#Instagram: https://instagram.com/yourname || instagram
#Skype: skype:yourname?call|chat || skype
social_icons:
enable: true
icons_only: false
transition: true
# Follow me on GitHub banner in right-top corner.
# Usage: `permalink || title`
# Value before `||` delimeter is the target permalink.
# Value after `||` delimeter is the title and aria-label name.
github_banner: https://github.com/tankeryang || Follow me on GitHub
# Blog rolls
links_icon: link
links_title: 博客镜像 & 友情链接
links_layout: block
#links_layout: inline
links:
淦 - github: https://tankeryang.github.io
淦 - coding: https://tankeryang.coding.me
淦 - gitee: http://tankeryang.gitee.io
未知: https://deeeeeeeee.github.io
简单可依赖: https://www.tiexo.cn/
刘伟的博客: https://darrenliuwei.com
# Sidebar Avatar
# in theme directory(source/images): /images/avatar.gif
# in site directory(source/uploads): /uploads/avatar.gif
avatar:
url: /uploads/my.jpg
rounded: true
# Table Of Contents in the Sidebar
toc:
enable: true
# Automatically add list number to toc.
number: true
# If true, all words will placed on next lines if header width longer then sidebar width.
wrap: false
# Creative Commons 4.0 International License.
# http://creativecommons.org/
# Available: by | by-nc | by-nc-nd | by-nc-sa | by-nd | by-sa | zero
creative_commons: by-nc-sa
#creative_commons:
sidebar:
# Sidebar Position, available value: left | right (only for Pisces | Gemini).
position: left
#position: right
# Sidebar Display, available value (only for Muse | Mist):
# - post expand on posts automatically. Default.
# - always expand for all pages automatically
# - hide expand only when click on the sidebar toggle icon.
# - remove Totally remove sidebar including sidebar toggle.
#display: post
display: always
#display: hide
#display: remove
# Sidebar offset from top menubar in pixels (only for Pisces | Gemini).
offset: 12
# Back to top in sidebar (only for Pisces | Gemini).
b2t: true
# Scroll percent label in b2t button.
scrollpercent: true
# Enable sidebar on narrow view (only for Muse | Mist).
onmobile: true
个性化设置
因为NexT可配置的选项太多,在这里我就不一一展开了,下面在介绍两个个性化的设置
主题标签插件
关于标签插件,大家可以回顾一下前面的内容。NexT也自带了一些标签插件供用户使用
note
提示块标签,效果就像你看到的这个提示块
配置如下:
1
2
3
4
5
6
7
8
9
10
11
12
13
# Note tag (bs-callout).
note:
# Note tag style values:
# - simple bs-callout old alert style. Default.
# - modern bs-callout new (v2-v3) alert style.
# - flat flat callout style with background, like on Mozilla or StackOverflow.
# - disabled disable all CSS styles import of note tag.
style: flat
icons: true
border_radius: 2
# Offset lighter of background in % for modern and flat styles (modern: -12 | 12; flat: -18 | 6).
# Offset also applied to label tag variables. This option can work with disabled note tag.
light_bg_offset: 3
使用方法:
1
2
3
4
5
{% note class %}
Any content (support inline tags too).
{% endnote %}
# 支持的class: class : default | primary | success | info | warning | danger.
label
label标签,给文字加底色配置如下:
1
2
# Label tag.
label: true
使用方法:
1
2
3
{% label class@Text %}
# 支持的class : default | primary | success | info | warning | danger.
选项卡
效果如下:
我是选项卡1
1 |
我是代码框1 |
我是选项卡2
1 |
我是代码框2 |
配置如下:
1 |
# Tabs tag. |
使用方法:
1
2
3
4
5
6
7
8
9
10
11
12
13
14
15
{% tabs 选项卡1 选项卡2 %}
<!-- tab 选项卡1 -->
我是选项卡1
{% codeblock %}
我是代码框1
{% endcodeblock %}
<!-- endtab -->
<!-- tab 选项卡2 -->
我是选项卡2
{% codeblock %}
我是代码框2
{% endcodeblock %}
<!-- endtab -->
{% endtabs %}
配置Git与Travic-CI持续集成
这一步是最能体现 自动化博客写作流程 的关键。务必仔细阅读。
github,gitee,coding新建博客项目
在github上新开一个repo,repo名:
USERNAME.github.io
同理,coding
repo名:
USERNAME, gitee repo名:
USERNAME
USERNAME为你的github,gitee,coding用户名
pages服务参考:github,coding,gitee
添加.gitignore
进入myblog文件夹,新增.gitignore文件,若存在则检查是否与如下一致:
1
2
3
4
5
6
7
.DS_Store
Thumbs.db
db.json
*.log
node_modules/
public/
.deploy*/
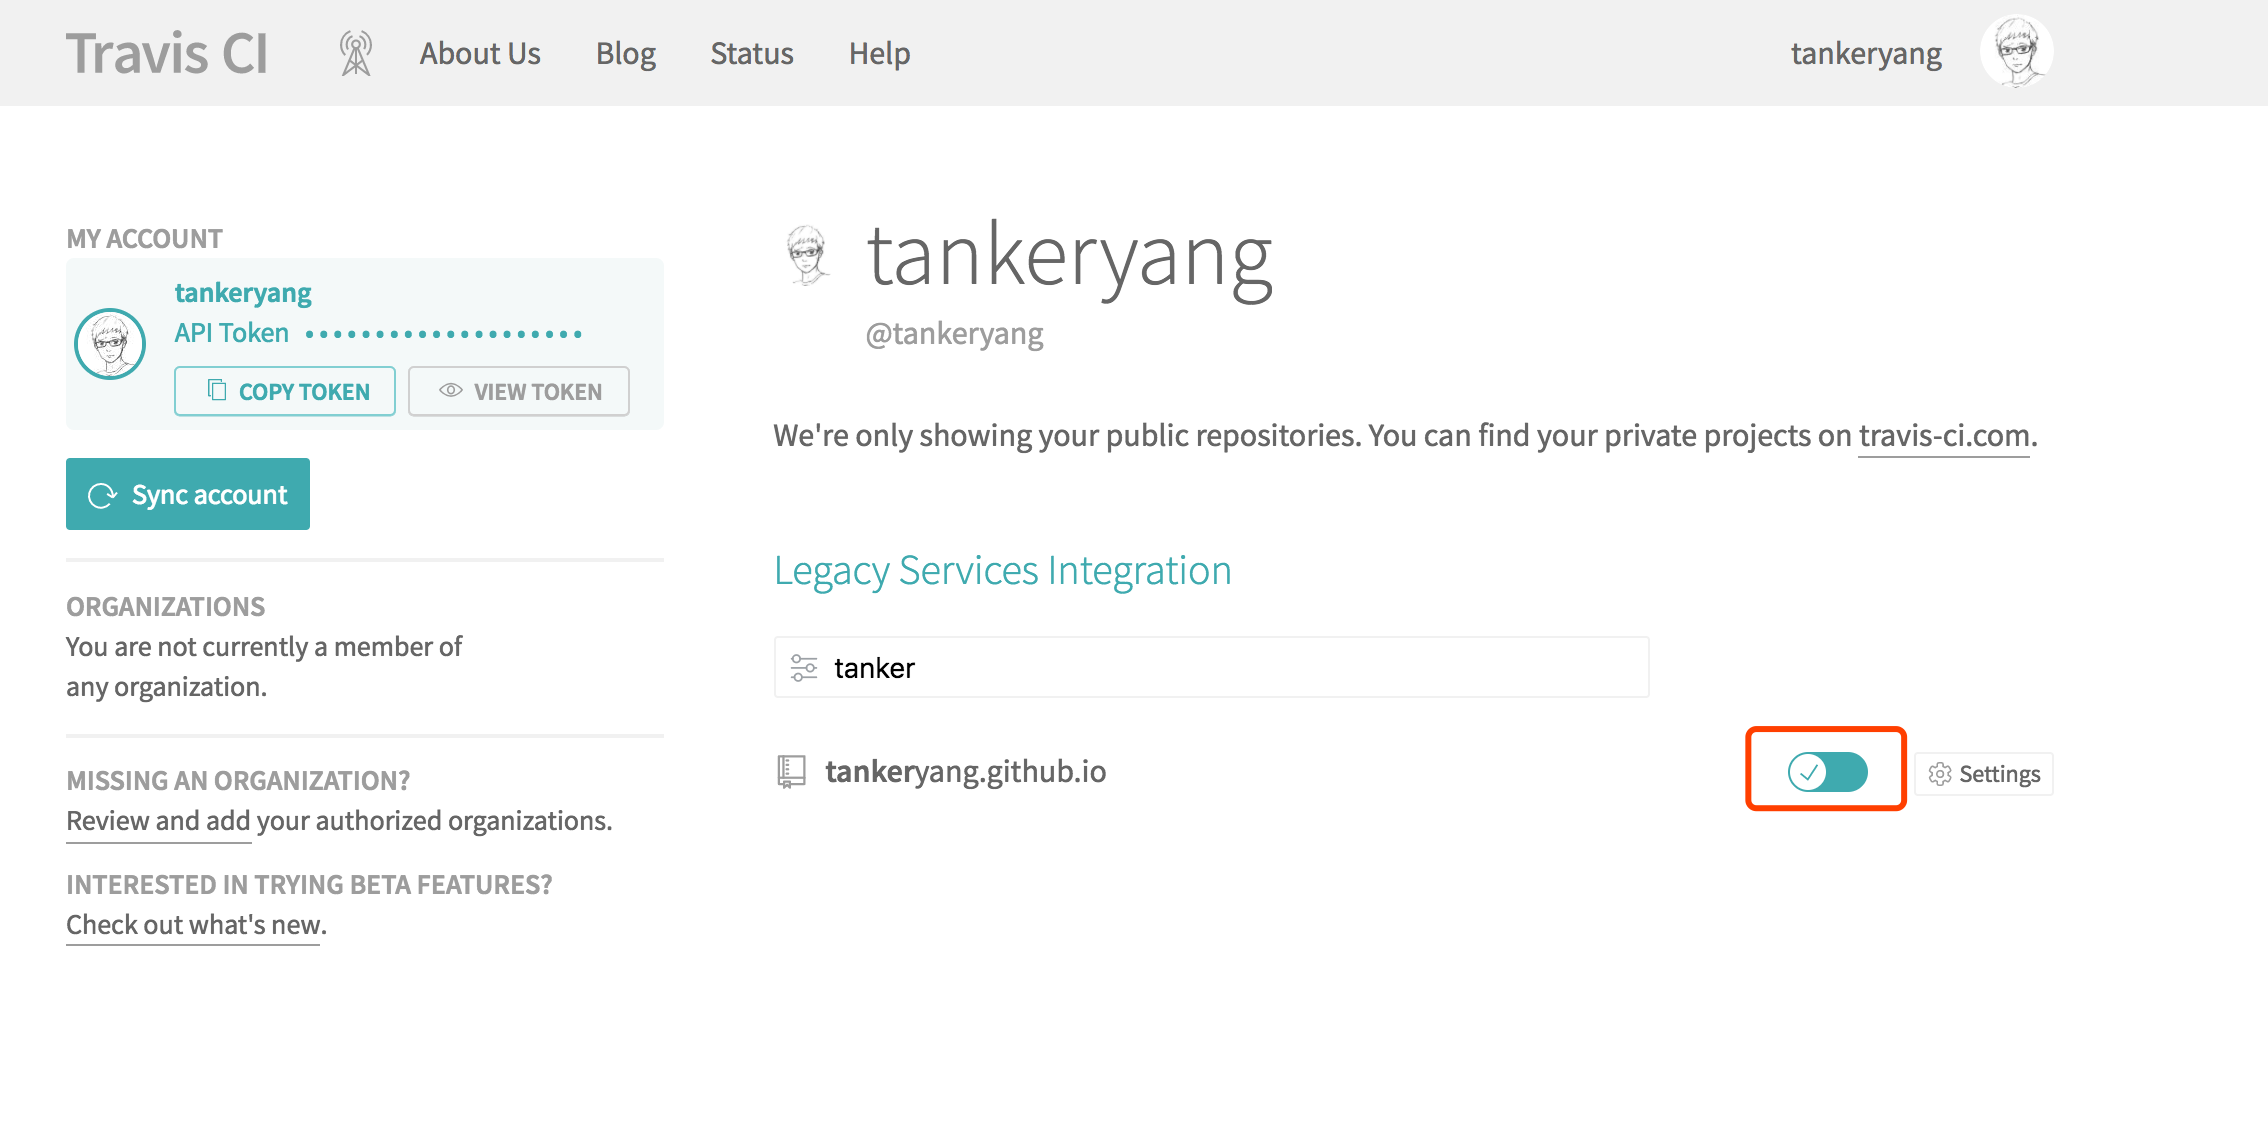
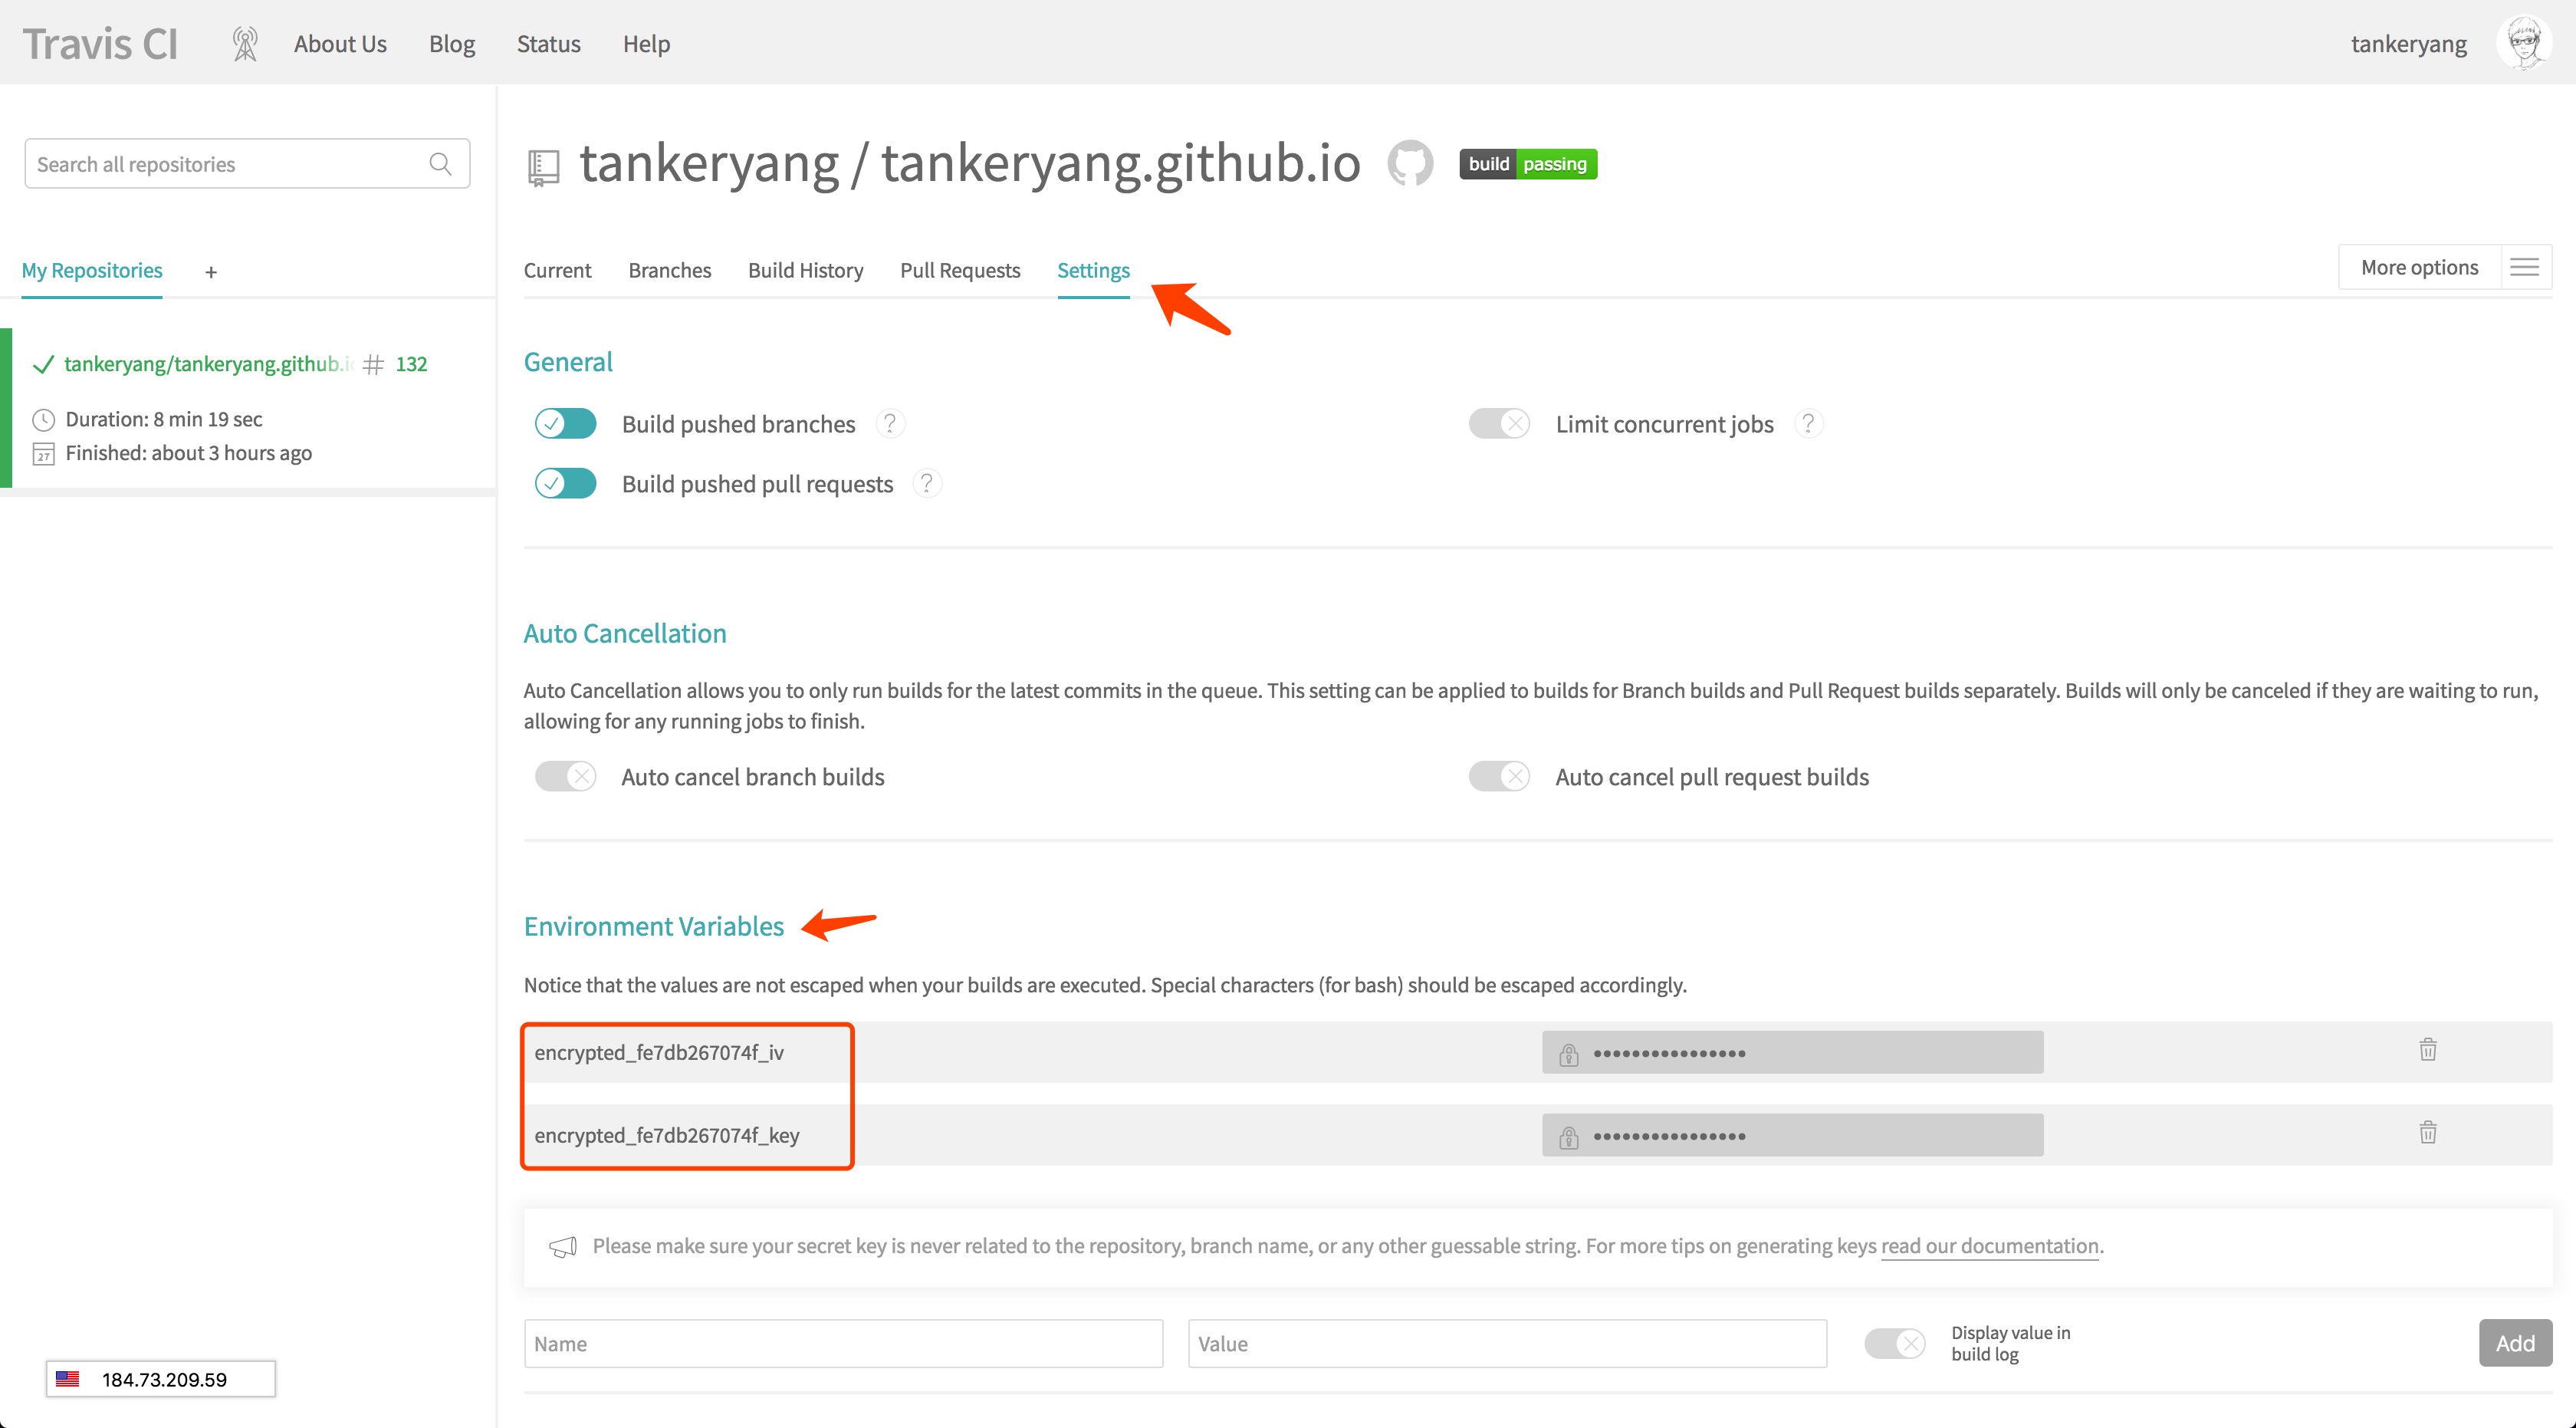
设置travis关联USERNAME.github.io
-
先用github账号登陆travis
-
勾选你的博客项目,顺便点旁边的setting进入设置,参照图2来勾选:
为博客项目设置deploy key
这一步比较重要,这是travis能否访问你的repo的关键。按照下面的步骤配置:
-
在
myblog下新建一个.travis文件夹,并进入.travis文件夹 -
在
myblog/.travis下生成一个专门给travis用的ssh key:
执行ssh-keygen -t rsa -f travis_rsa -C "your@email.com",遇到密码输入直接enter回车,email记得替换 -
github博客项目添加travis_rsa.pub公钥
将.travis下的travis_rsa.pub的内容复制,按下图进入Add deploy key界面,将内容粘贴,并勾选可读写权限(一定不要遗漏!!!)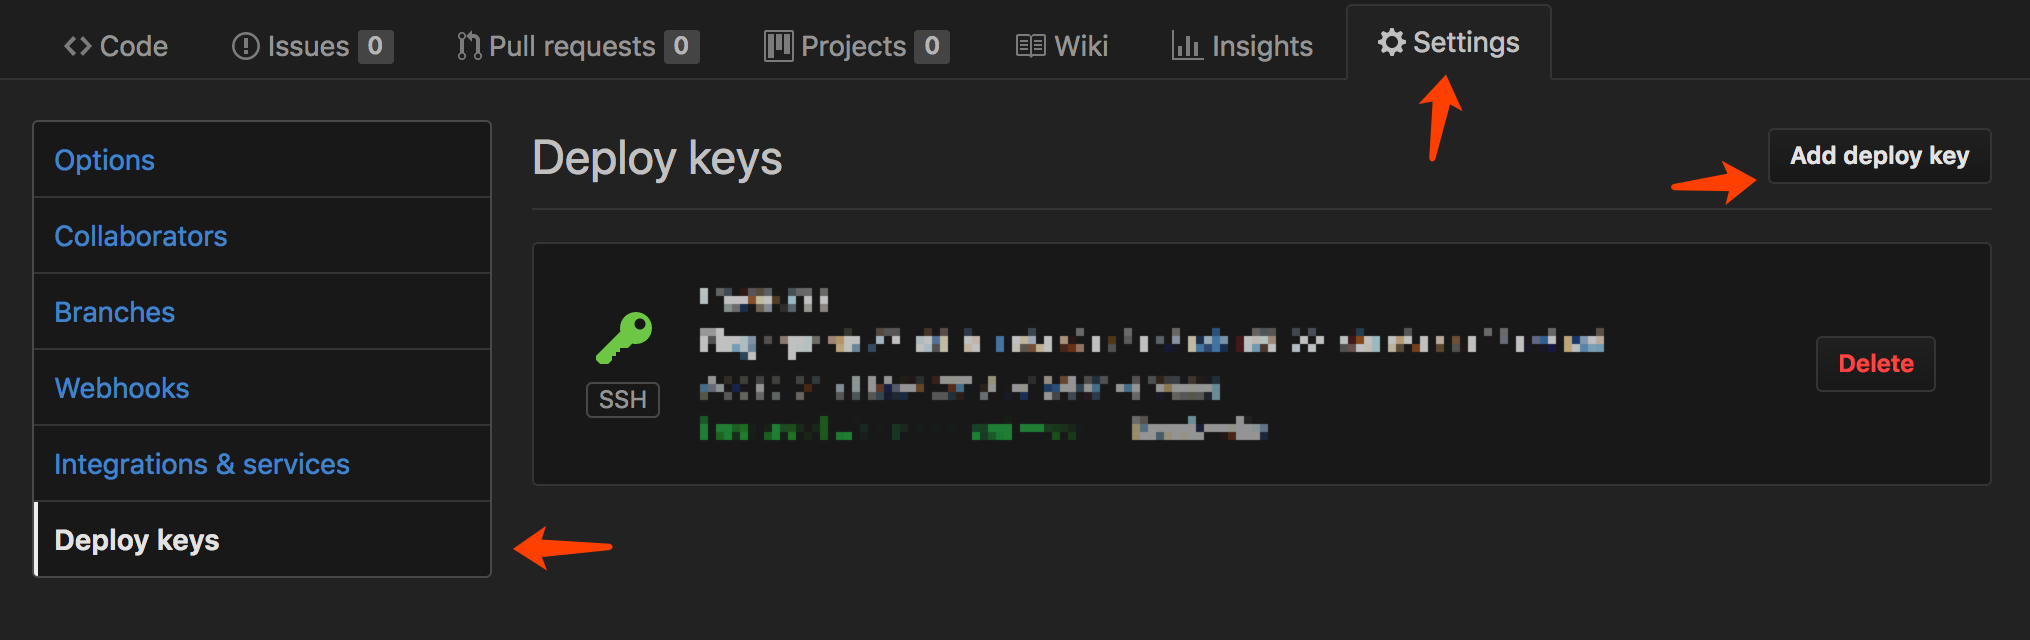
-
coding过程同上
-
gitee因为项目的
deploy key不能设置可写入权限,所以只能将travis_rsa.pub添加到个人的公钥
加密travis_rsa
-
先安装gem(关于ruby,gem相关的安装这里就不列出来了,我相信你的动手能力:))
-
接着安装travis命令行工具:
sudo gem install travis -
装好后,进入
myblog/.travis文件夹,在当前路径下执行如下命令:1
2travis login --auto
travis encrypt-file travis_rsa -add
需要注意的是,travis命令行工具貌似在Windows下不太好使…因此需要换另外的方法使得travis能访问到github,coding和gitee上的博客项目,主要是通过 token 来访问。相关的配置百度一下就有很多教程,比ssh来的更简单。就是在 安全 性上差了一点,因为 token 是有操作所有 repo 的权限的…
加密完成后你会发现.travis文件夹下多了个travis_rsa.enc的文件,这个就是加密后的travis_rsa。同时myblog下也多了.travis.yml文件。下面我们就配置一下.travis.yml。
-
先将
.travis下的travis_rsa,travis_rsa.pub删掉。请记住一定要删掉!!!只保留加密文件 -
按照下面配置
.travis.yml:.travis.yml 1
2
3
4
5
6
7
8
9
10
11
12
13
14
15
16
17
18
19
20
21
22
23
24
25
26
27
28
29
30
31
32
33
34
35
36
37
38
39
40
41
42
43
44
45
46
47
48
49
50
51
52
53
54
55
56
57
58
59
60
61language: node_js
node_js: stable
branches:
only:
- dev
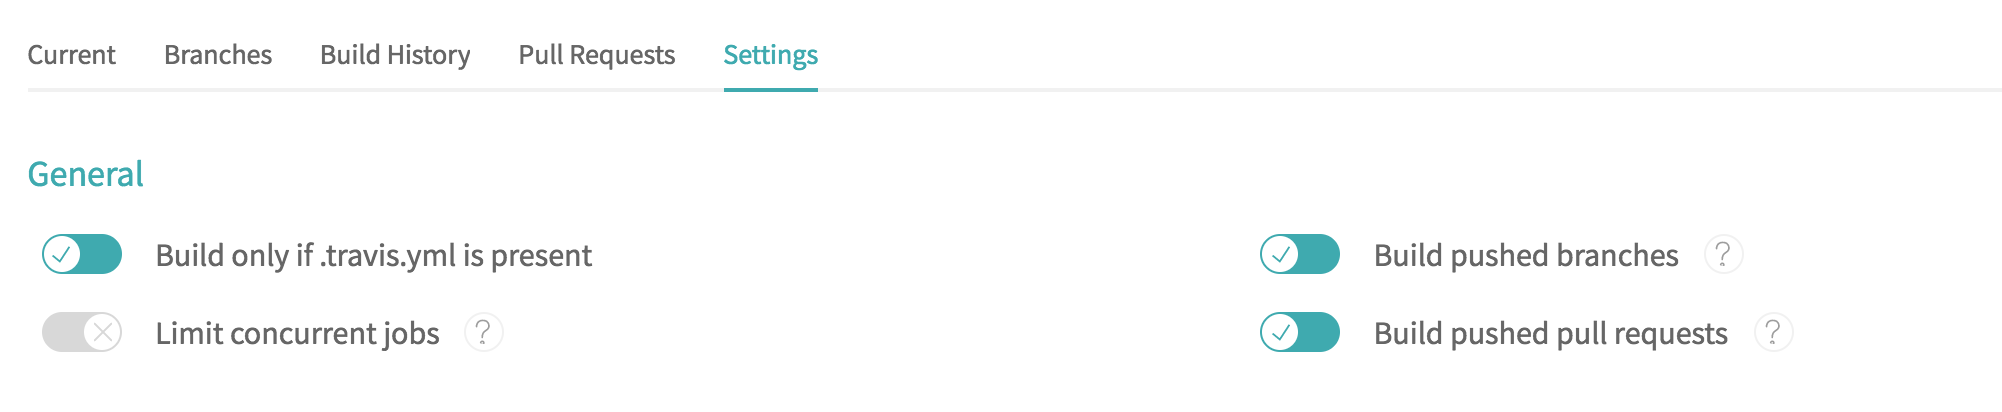
before_install:
# 解密SSH
# encrypted_key和encrypted_id可以在travis里setting查看,具体位置参考下图
- openssl aes-256-cbc -K ${你的encrypted_xxxx_key} -iv ${你的encrypted_xxxx_iv}
-in .travis/travis_rsa.enc -out ~/.ssh/travis_rsa -d
- chmod 600 ~/.ssh/travis_rsa
- mv -fv .travis/config ~/.ssh/config
# 安装hexo以及一些插件,没用到的可移除相关命令
install:
- npm install hexo-cli -g
- npm install hexo-math --save
- npm install hexo-generator-searchdb --save
- npm install hexo-symbols-count-time --save
- npm install hexo-generator-feed --save
- npm install hexo-wordcount --save
- npm install mermaid --save
- npm install hexo-tag-mermaid --save
- npm install hexo-tag-plantuml --save
# 安装next主题插件,没用到的可移除相关命令
before_script:
- cd ./themes/next
- git clone https://github.com/theme-next/theme-next-fancybox3 source/lib/fancybox
- git clone https://github.com/theme-next/theme-next-jquery-lazyload source/lib/jquery_lazyload
- git clone https://github.com/theme-next/theme-next-needmoreshare2 source/lib/needsharebutton
- git clone https://github.com/theme-next/theme-next-pace source/lib/pace
- git clone https://github.com/theme-next/theme-next-pangu.git source/lib/pangu
- git clone https://github.com/theme-next/theme-next-reading-progress source/lib/reading_progress
- cd ..
- cd ..
# 构建博客
script:
- hexo -version
- hexo clean && hexo g
after_script:
# 设置环境
- set -ev
- export TZ='Asia/Shanghai'
- cd ./public
# 提交
- git config user.name "USERNAME" # 你的github用户名
- git config user.email "your@email.com" # 你的github邮箱
- git init
- git add .
- git commit -m "Site updated:`date +"%Y-%m-%d %H:%M:%S"`"
# push
- git remote add coding git@git.coding.net:USERNAME/USERNAME.git # USERNAME为你的coding用户名
- git remote add gitee git@gitee.com:USERNAME/USERNAME.git # USERNAME为你的gitee用户名
- git push -u origin master -f
- git push -u coding master -f
- git push -u gitee master -f
最后,将你的本地博客目录与远程github博客项目关联
-
先初始化本地博客目录用git管理
1
2
3
4
5
6git init
git remote add origin git @github.com:USERNAME/USERNAME.github.io.git
git checkout -b dev
git add .
git commit -m "first commit"
git push -u origin dev -
上travis检查构建流程,看看是否有问题,有问题再根据日志进行
.travis.yml的修改 -
构建完成后,分享到朋友圈:)
-
之后写完文章只要
git push origin dev就ok了。注意要在dev分支下进行。可以通过git checkout dev切换分支
从年初开始写,一直到今天(2018-05-23)才写完…足以证明我是一个多么懒到没谱持之以恒的人,这样的博主还不赶快献爱心一个?